
基本用法
ConstraintLayout是Google用于减少布局嵌套而推出的一个布局,能够在效果达到LinearLayout、ReactiveLayout和FrameLayout的情况下减少布局的嵌套,它通过四条边的约束来达到确定位置的目的。一般我们会使用的属性如下:
1 | app:layout_constraintXXX_toXXXOf="" |
XXX可指代Top、Bottom、Start和End四个方向,其中Start和End其实对我们来说就是左右,但是Google为了适配其他国家的语言(他们的文字可能是从右往左的),而使用了Start和End而不是Left和Right。
当我们需要一个View在父容器中间时可以这样设置。
1 | app:layout_constraintStart_toStartOf="parent" |
可以使用parent来简单地指代父容器,而不需要父容器一定要有具体的id。
同时,也可以通过设置来达到View垂直或水平居中于某一个View的边的效果。
例如,这里有一个比较特殊的用法,可以让View垂直于某一个View下边。
1 | app:layout_constraintTop_toBottomOf="@id/test" |
可以看到,这里View的上下便都被id为test的View的下边约束住了,我们可以把这种约束想象成两条弹力系数一样的橡皮筋,这样,view就只能垂直于id为test的下边了。
ConstrainLayout有点比较特殊,如果它的宽度或者高度设置成了0dp之后,那么它的边就会向被约束的边对齐,如果我们想要一个View充满整个容器可以这样做。
1 | <View |
进阶用法
权重
权重我们经常能够在LinearView中看到,其实ConstrainLayout中也存在,但是需要我们先对需要设置权重的View相互之间建立约束关系。即首尾相连,最前于最后两个View于父容器建立约束,具体代码如下:
1 | <View |
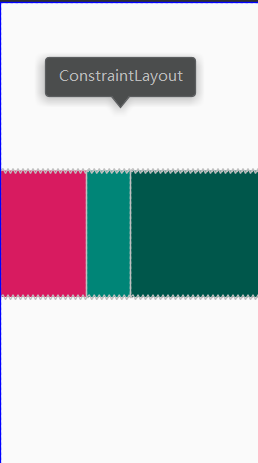
效果图如下
圆形
通过圆心、半径、角度等对View进行约束,这几个属性具体如下:
1 | app:layout_constraintCircle="@id/view" |
这段xml很好理解,圆心为id为view的View,半径为180dp,角度为90度
避免越界
1 | app:layout_constrainedWidth="true" |
这两个属性可以保证View的宽高不会超过约束的属性。
百分比定位
1 | app:layout_constraintVertical_bias="0.3" |
注意,这里的百分比是指的被约束空间的百分比,而不是父容器的百分比,这需要与下面的app:layout_constraintWidth_percent区分开来
这个属性就是指定位在垂直防线30%处
约束链
通过这个属性可以实现两个组件打包对其、分开对其。默认为均匀扩散。
- packed(打包)
- spread(扩散)
spread_inside(内部扩散)
如下代码可以实现两个组件打包,可以实现两个组件一起居中等效果,这里需要注意,两个组件需要首尾相连,可参考权重所示代码
1
app:layout_constraintVertical_chainStyle="packed"
宽高比
1
app:layout_constraintDimensionRatio="2:1"
这里表示宽高比为2:1,需要注意,使用这个属性的话需要宽或高中的一个属性是确定的。
百分比布局
这里指的是View相对于父容器的大小
1 | app:layout_constraintWidth_percent="0.3" |
辅助组件
GuideLine
方向设置
1 | android:orientation="vertical" |
关于辅助线的具体防线,这里有三个属性可以帮助设置
- 距离起始方向的距离 layout_constraintGuide_begin
- 距离结束方向的距离 layout_constraintGuide_end
百分比 layout_constraintGuide_percent
Group与Layer
都可以通过 constraint_referenced_ids来引用其他View,Group可以一起给他们设置可见度,而Layer可以一起给他们设置位移和旋转等。
Barrier
与BaseLine类似的是,都可以设置隐形的约束,但是Barrier可以通过某个View的位置动态调整。
Flow
可以通过设置wrapMode属性来控制View的排列方式,有chain、aligne和none三个属性值,none是默认值。